Module Setup
Initial Configuration
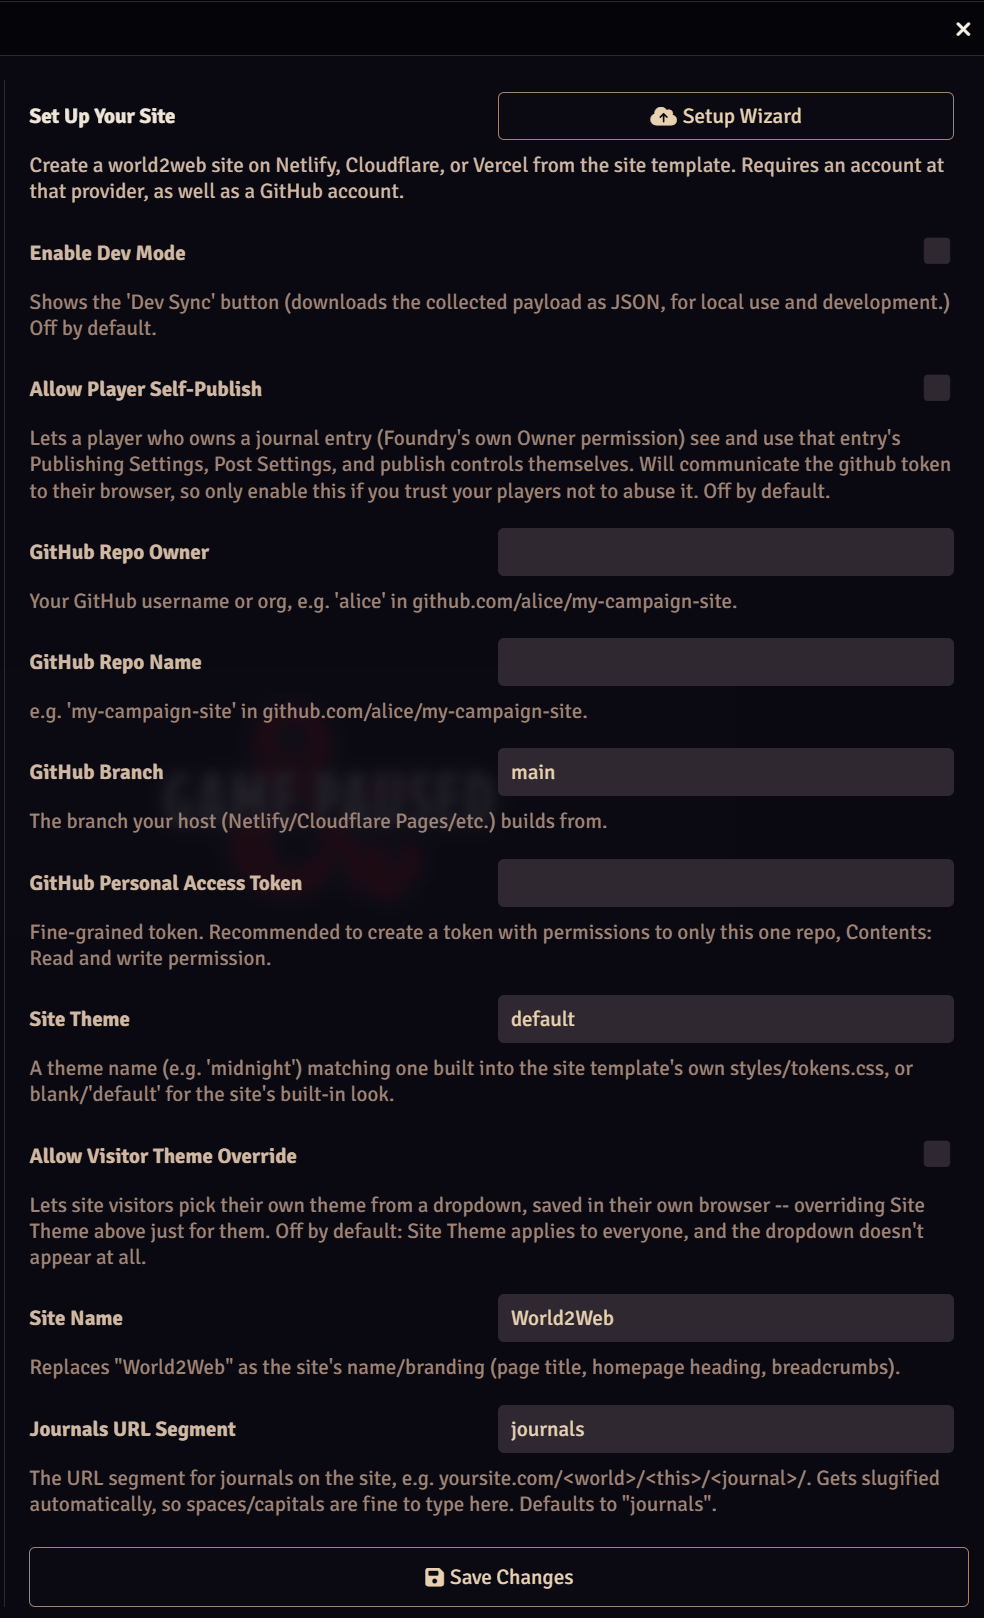
After enabling a module and creating a GitHub account, you can go to Foundry's standard Configure Settings button, and select World2Web to set up a site for publishing. Most first time users will simply want to use the Setup Wizard at the top of the panel. The entire panel looks like this:
Setup Wizard: Step 1
Page 1 of the Wizard will ask you to choose a repository name and a hosting provider.
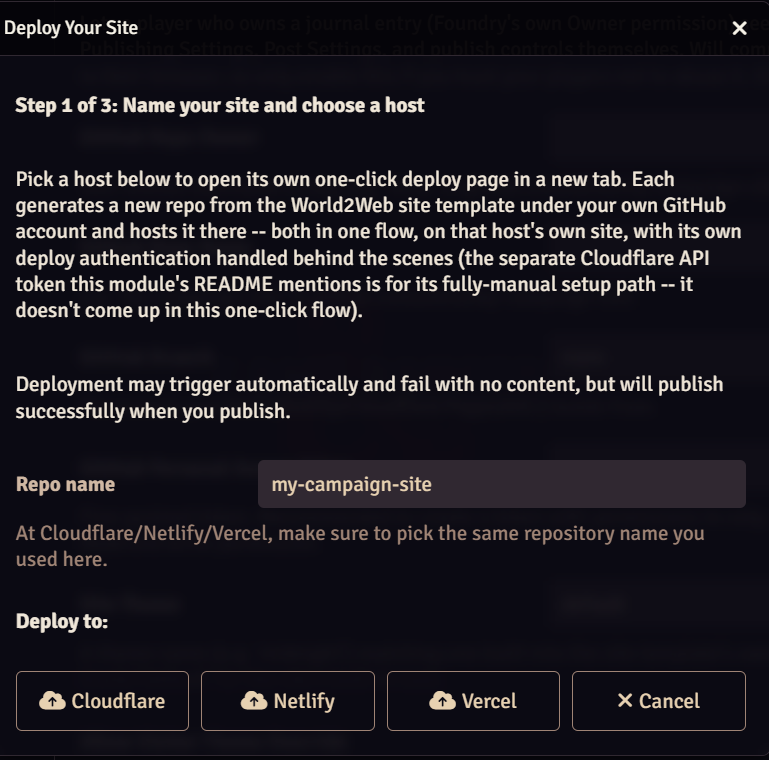
Repo name: The name of your repository at GitHub. Repository names must be unique. It is recommended to use something that makes sense to you reading it; make a note of what you choose, as you will need to re-enter it at your hosting provider
Deploy to: There are three buttons, one each for Cloudflare, for Netlify, and for Vercel. Each button will open a new tab at that provider, and take you through their wizard program to create your website from World2Web's template. Make absolutely certain you use the same repository name you chose above, or the integration or fail. On Vercel, it may look like this:
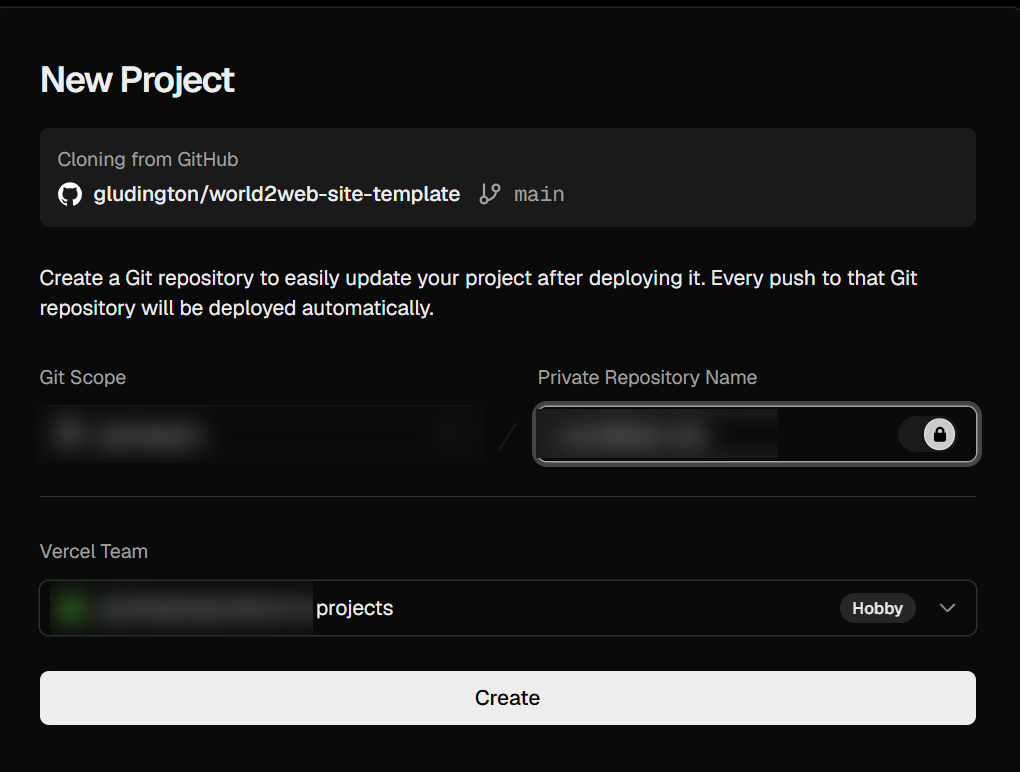
The provider will set up a listener for changes at GitHub and deploy them as a website
When you have gone through your provider's wizard, it will likely attempt to build the site, and it will fail, as there is not content yet. This is normal. Keep the content provider's tab open for easy access, and return to your Foundry Tab, where you will see Step 2.
Setup Wizard: Step 2
After your new site is created, you need to create a Personal Access Token (PAT) to access the content. This protects your site so that nobody except you and those you authorize, can see your content. This wizard will prompt you to open up GitHub:
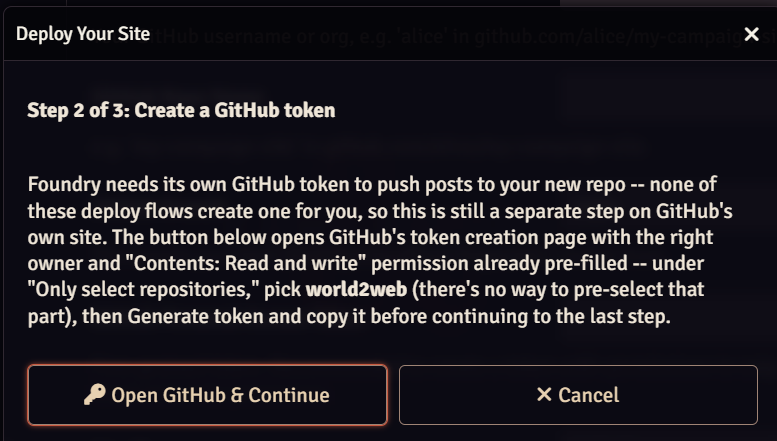
Here, on GitHub you will create a PAT so that world2web can access only this single repository, and none of your content. You will be taken to this page:
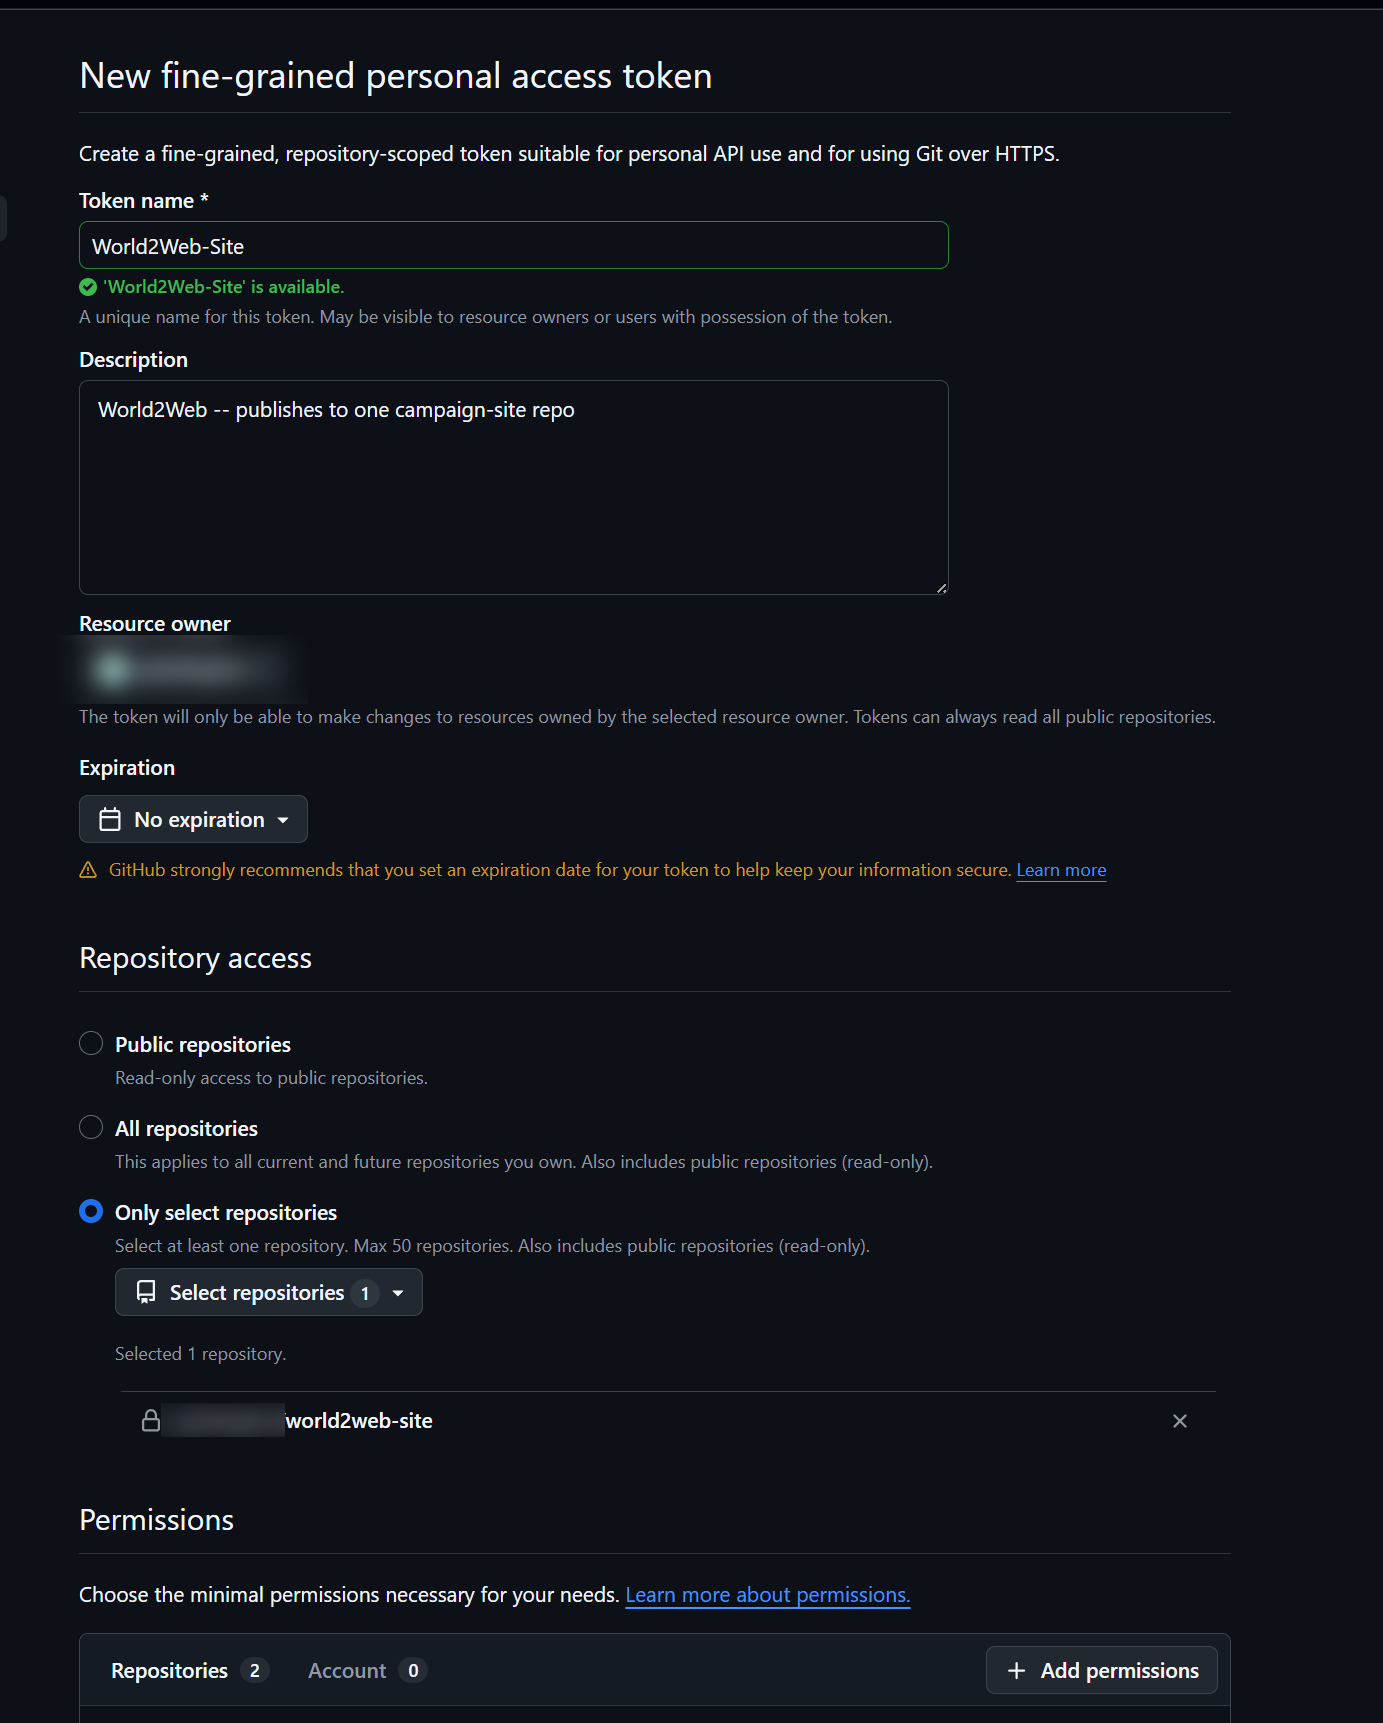
Of the many options of this page, you need to select three.
Name your token something relevant
Set its expiration to not expiring. You can require them to change every X days, but that will require you update your module settings on that schedule
Restrict its permissions to Only Select Repositories, and select the repository you just created for your site in the previous setp. Its permission will be set to Read and Write, which will be all that is required.